Stately Boston Historic Home: Part 2 - Creating A Dressing Room/Master Closet
In last week’s blog, I told you about one of our recent projects, a Stately Boston historic home, where I showed you how we created a master bathroom space in this home.
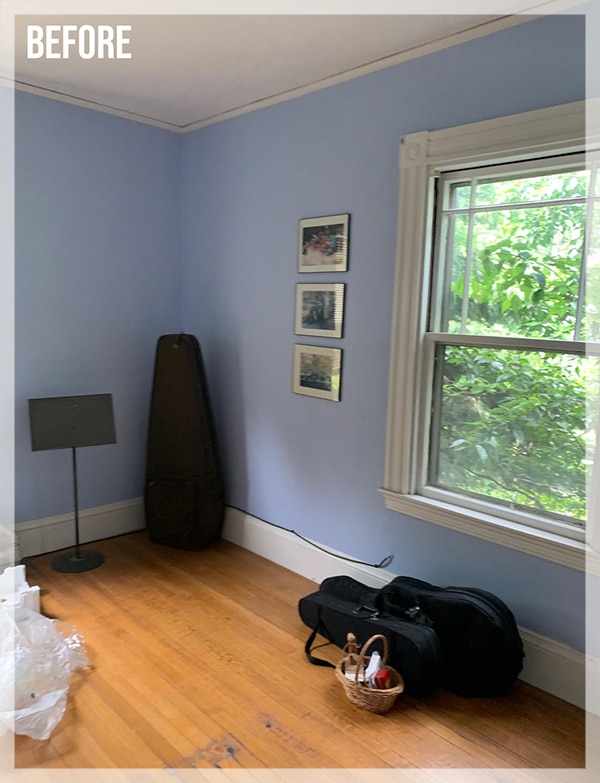
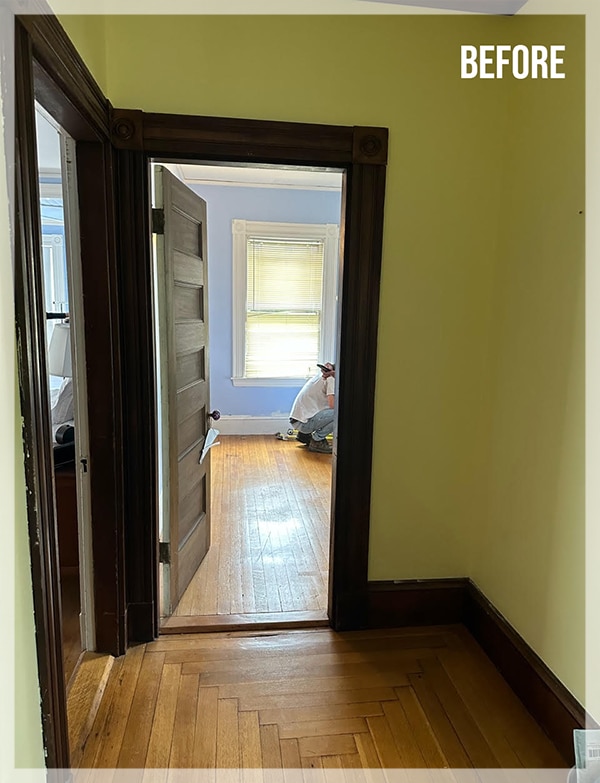
As part of the same renovation, we also created a dressing room/closet space in this home using an extra bedroom adjacent to the existing master bedroom space. We also created a new entry to this master suite area. These changes allowed us to tie the three new spaces together with a private entrance. My carpenter replicated the existing historic woodwork perfectly and seamlessly tied it into the existing hallway space.


In designing the new dressing room area, we decided to use all custom cabinetry and to keep everything open and accessible. This allowed our client to see everything at once, which is more functional for this busy family, and it allowed us to make the most storage in this space.
The room originally contained a small closet, which we renovated and used for storage of long items. The room also originally had two windows, one on each of the two exterior walls. To create the storage space that we needed, we decided to sacrifice one window, which was in very close proximity to the neighboring home. We kept the exterior of the window in place so as not to disturb the exterior facade of the house. Inside, we created floor-to-ceiling cabinetry with hanging storage. The other south-facing window allows the natural light to stream throughout the space, and the added recessed and decorative lighting brightened the space much more than the light from the mostly shaded lost window ever did.
These beautiful older homes sometimes have wonderfully scaled ceiling heights, and this home followed suit. We took advantage of the high ceiling to create extra storage along the perimeter of the space, also using custom cabinetry. My homeowner purchased matching bins and uses this space for seldom-used or seasonal items, which can be easily accessed with a step stool. I designed a “his and her” style closet, giving each of my clients a side with double hanging space, hooks, and additional storage around the perimeter of the room. Then I designed a peninsula for shoe storage, again a side for him and a side for her.
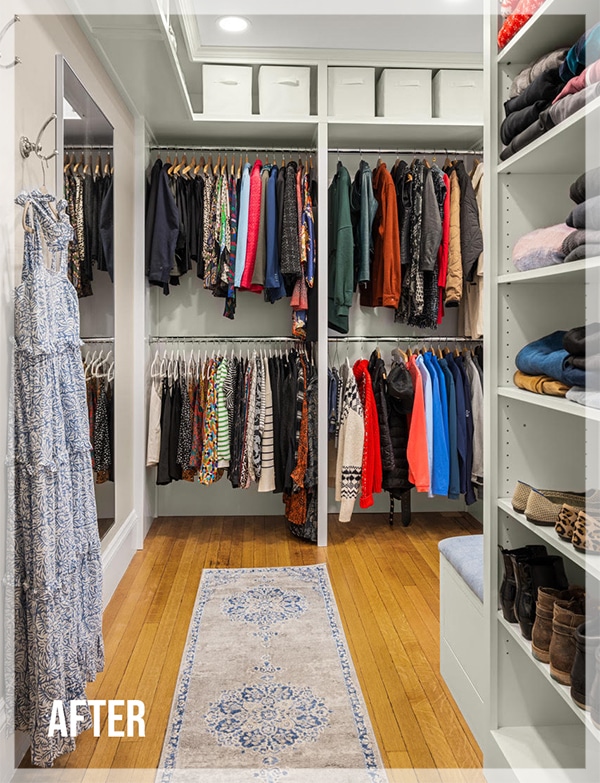


This floor-to-ceiling peninsula of cabinetry extends into the space using the floor space and ceiling height strategically. At the end of the peninsula, I designed a custom bench with a single drawer and upholstered cushions. I also added a beautiful decorative sconce at the end of the peninsula.
My custom cabinet maker and my contractor tied in all of these details with their expert craftsmanship. Our electrician added recessed lighting and re-wired everything in both spaces which helped to bring this home up to current electrical standards. Our plumbers worked meticulously moving, removing, and re-locating plumbing throughout the project. Our glass and countertop, tile vendors, and other vendors always go the extra mile to help me bring these designs to life. An older home like this one creates many challenges from a design and construction standpoint, and as always, I am very thankful for my team’s skills, expertise, and willingness to go the extra mile.
Having worked with this client before on previous projects, we were able to develop a great working relationship and a great level of trust, which always provides us the ability to do our best creatively to transform the space into one that they might never have imagined.
I am always so excited to revisit a project like this a few months after construction is completed and to hear how well these new spaces are functioning for the family. Not only did we create a beautiful space, but a functional space that my clients enjoy every single day.
Until Next Time,
Gia
From The Blog

Transforming An Awkward Space: Second Floor Sitting Area
In many homes, there are awkward or unusual spaces. While these spaces give character to the home, they also cause confusion about how to use and...
Functional Luxury: A Luxurious First Floor Bath Transformation
We recently completed the final stages of a renovation for a beautiful country home that we designed and renovated over several phases. Each stage...


